I noticed something slightly uncomfortable the first time I really paid attention to my laptop webcam.
Every time I opened my laptop, that tiny camera was sitting there facing me. I rarely used it, but I knew it could potentially be accessed by apps or websites that had camera permission. Even when I wasn’t worried about someone actually spying on me, I still didn’t like the idea of leaving the camera uncovered when I wasn’t using it.
My first solution was pretty basic: I put a small piece of tape over the webcam.
It worked, but it looked messy. After opening and closing the laptop repeatedly, the tape also started collecting dust and losing its stickiness. That’s when I started looking at webcam privacy covers for laptops.
A small sliding cover turned out to be a much cleaner solution.
Why I Started Using a Webcam Privacy Cover
Laptop webcams are useful for Zoom meetings, Google Meet calls, Microsoft Teams, online classes, interviews, and even casual video chats. The problem is that you don’t need the camera active all the time.
A privacy cover gives you a physical way to block the camera lens when you’re not using it.
That’s important because software privacy settings and physical protection solve slightly different problems.
You can check which apps have camera access through Windows or macOS settings, but a physical cover gives you something very simple: when the cover is closed, the camera lens is physically blocked.
For me, that was more convenient than constantly checking camera permissions.
What Is a Webcam Privacy Cover?
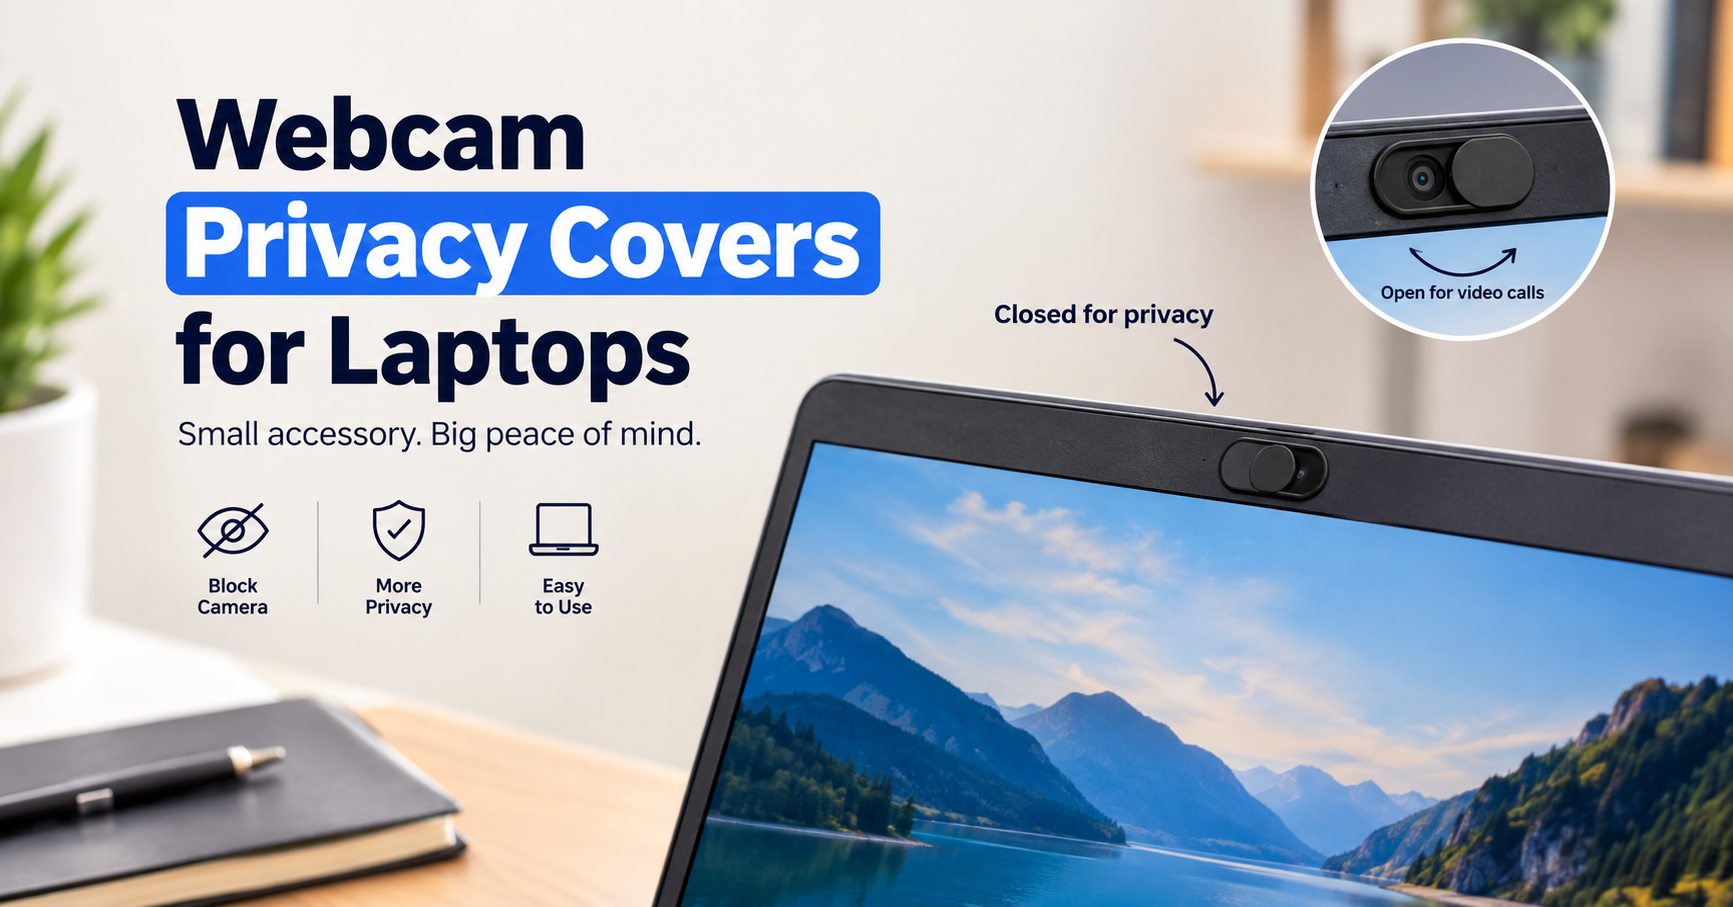
A webcam privacy cover is a small accessory that attaches over the built-in camera of a laptop.
Most models have a tiny sliding mechanism. You slide it open when you want to use the camera and slide it closed afterward.
They’re usually made from plastic or metal and are designed to be thin enough to stay attached while the laptop is closed.
The idea is extremely simple:
Cover closed → camera blocked.
Cover open → camera available for use.
There isn’t much technology involved, and that’s actually one of the reasons I like them.
My Experience With Laptop Webcam Covers
The first thing I noticed was how much easier they were than using tape.
With tape, I had to remove it before a video call and put it back afterward. Sometimes the adhesive left a little residue around the camera.
A sliding cover eliminated that hassle.
I could join a Google Meet call, slide the cover open, and start the meeting. Once the call was finished, I simply closed it.
Another thing I learned was that thickness matters.
I initially thought any webcam cover would work. That’s not necessarily true.
Some cheap covers are surprisingly thick. On a thin laptop, this can prevent the lid from closing completely or put unnecessary pressure on the display when the laptop is closed.
So if you’re buying one, don’t just look at the price. Look at its thickness and design too.
Benefits of Using a Webcam Privacy Cover
1. Physical Camera Protection
The biggest advantage is obvious: the cover physically blocks the webcam.
Even if the camera is accidentally activated, the lens can’t see through an opaque cover.
It’s a simple extra layer of privacy.
2. Easy to Use
There are no batteries, apps, cables, or complicated settings.
Most covers simply slide open and closed.
This makes them especially useful for people who frequently move between video calls and normal laptop use.
3. Small and Inexpensive
Webcam covers are usually tiny accessories.
They don’t take up space in your laptop bag, and you don’t have to remember to charge them.
4. Better Than Constantly Using Tape
Tape can work in an emergency, but it’s not the cleanest long-term solution.
A properly installed cover looks much more intentional and can be opened and closed repeatedly.
5. Useful for Shared or Public Spaces
If you regularly use your laptop in a college, office, coworking space, library, or other shared environment, a physical webcam cover can provide some extra peace of mind.
You don’t have to wonder whether you remembered to disable the camera before leaving your desk.
How to Choose the Right Webcam Privacy Cover
Not every laptop has the same webcam design, so take a minute to check your laptop before buying.
Here are the things I’d pay attention to.
Check the Camera Location
Most laptop webcams are located in the center of the top display bezel.
However, some laptops have unusual camera designs or very narrow bezels.
Measure or visually inspect the available space around the camera before ordering a cover.
Look at the Thickness
This is one of the most important details.
A cover that’s too thick can interfere with the laptop lid.
For thin laptops such as MacBooks, ultrabooks, and other slim models, look specifically for low-profile designs.
Choose a Smooth Sliding Mechanism
The slider should move easily but shouldn’t feel so loose that it opens by itself.
A simple mechanical cover is usually all you need.
There’s no reason to pay extra for unnecessary electronics or features.
Check the Adhesive
Most covers use adhesive backing.
A good adhesive should stay attached during normal use without making removal impossible.
Before installing one, make sure the area around your webcam is clean and dry.
How to Install a Webcam Privacy Cover
Installation usually takes only a few minutes.
Step 1: Clean the Area
Turn off your laptop and gently clean the area around the webcam.
A microfiber cloth works well for removing fingerprints and dust.
Don’t spray liquid directly onto the laptop screen.
Step 2: Test the Position
Before removing the adhesive backing, place the cover over the webcam.
Check that the camera lens is positioned correctly inside the opening.
This step sounds unnecessary, but it’s one of the mistakes I made the first time.
I stuck mine slightly off-center and had to reposition it.
Step 3: Remove the Adhesive Backing
Once you’re happy with the position, carefully remove the protective film from the adhesive.
Try not to touch the adhesive surface with your fingers.
Step 4: Attach the Cover
Place it over the webcam and press gently for several seconds.
Don’t push aggressively against the display.
Step 5: Test the Camera
Open the camera app on Windows or use an app such as Zoom, Google Meet, or Microsoft Teams.
Slide the cover open and confirm that the camera works normally.
Then close the cover and make sure the image becomes completely blocked.
Don’t Forget About Camera Permissions
A webcam privacy cover is useful, but I wouldn’t treat it as your only privacy measure.
Your operating system still controls which applications can access the camera.
On Windows, you can review camera permissions through Settings → Privacy & security → Camera.
On macOS, camera access can be reviewed through System Settings → Privacy & Security → Camera.
It’s worth checking these settings occasionally.
For example, if you installed a video-editing application, browser extension, meeting app, or other software that requests camera access, make sure you understand why it needs that permission.
The physical cover and software permissions work well together.
A Webcam Cover Doesn’t Replace Security Software
There’s an important distinction here.
A webcam cover protects what the camera can physically see. It doesn’t protect your laptop from malware, phishing, stolen passwords, or other security problems.
You should still:
- Keep Windows or macOS updated
- Use reputable security software
- Keep your browser updated
- Avoid suspicious downloads
- Review camera and microphone permissions
- Use strong, unique passwords
- Enable two-factor authentication where available
Think of the privacy cover as one small part of your overall privacy setup.
Common Mistakes to Avoid
Buying a Cover Without Checking Laptop Thickness
This is probably the easiest mistake to make.
A cover might look great in the product photos but be too thick for your particular laptop.
Always check the dimensions before purchasing.
Installing It Without Testing the Position
Don’t immediately remove the adhesive backing.
Place the cover over the camera first and check its alignment.
Once adhesive touches the bezel, repositioning it can be difficult.
Covering the Wrong Part of the Camera
Some laptop webcams have surrounding sensors or indicators.
Make sure the cover is designed to block the camera without interfering with other components.
Forgetting the Cover During a Video Call
This happened to me more than once.
I’d join a meeting, wonder why nobody could see me, and then realize the webcam cover was still closed.
It’s a small thing, but it’s worth remembering if you’re new to using one.
Choosing an Extremely Cheap Cover
Price isn’t everything.
A cover that doesn’t stick properly or has a slider that breaks after a few uses isn’t much of a bargain.
Look for something thin, simple, and reasonably well made.
Do Webcam Privacy Covers Affect Laptop Screens?
They can, depending on the design.
This is why ultra-thin covers are generally preferable for laptops.
When you close a laptop, the display and keyboard area come very close together. Adding a thick accessory between them can create unnecessary pressure.
If your laptop manufacturer recommends keeping the display area clear, follow that guidance.
For very thin laptops, another option is simply to use a removable cover rather than keeping a permanent one attached.
What About Built-In Webcam Shutters?
Some newer laptops come with built-in physical camera shutters.
If your laptop already has one, you probably don’t need an additional webcam cover.
A built-in shutter is usually the cleaner option because it was designed specifically for that laptop.
Before buying an accessory, look closely at your laptop’s webcam. You may already have a small physical slider that you haven’t noticed.
Are Webcam Covers Worth It?
For something so small, I think they can be worthwhile if you rarely use your laptop camera but want a quick physical privacy measure.
They’re especially convenient for people who:
- Work from home
- Attend frequent online meetings
- Study online
- Use shared workspaces
- Travel with a laptop
- Keep their laptop in a bedroom or private room
- Want a simple physical camera block
If you use your webcam several times every day, a sliding cover is particularly convenient because you can open and close it in seconds.
If you almost never use your webcam, even a removable cover can do the job.
A Simple Privacy Routine
After using a webcam cover for a while, I found that the best approach wasn’t complicated.
Before a video call:
- Open the meeting app.
- Check that the correct camera is selected.
- Slide the webcam cover open.
- Join the meeting.
After the call:
- Leave the meeting.
- Close the webcam cover.
- Close the laptop or continue working.
It takes only a few seconds.
The bigger lesson for me was that privacy doesn’t always require complicated tools. Sometimes a very simple physical solution is useful.
Final Thoughts
A webcam privacy cover isn’t a replacement for good cybersecurity habits, but it’s an inexpensive and practical addition to a laptop setup.
The best part is that you don’t have to think about software permissions every time you want a basic physical barrier. When the cover is closed, the camera lens is blocked.
Just make sure you choose a thin, well-fitting cover, install it carefully, and check your laptop’s camera permissions as well.
For such a tiny accessory, it can make everyday laptop use feel a little more comfortable—and sometimes that’s exactly what you want from a privacy tool.