
Introduction
A few years ago, I spent a lot of time upgrading my desk setup. I bought a nice monitor, a wireless mouse, a mechanical keyboard, and even a sleek desk lamp. Yet somehow, the desk still looked messy.
The problem wasn’t the gear—it was the cables.
Power cords dangled behind the desk, charging cables tangled together, and every time I needed to unplug something, I ended up pulling the wrong wire. The funny part was that even after spending money on better equipment, my workspace still felt cluttered because of a handful of visible cables.
Once I started focusing on cable management, everything changed. My desk looked cleaner, cleaning became easier, and I actually enjoyed sitting down to work.
If you’re building a minimal desk setup, cable management is one of the easiest upgrades you can make. Here are the best ideas, tools, and products that have helped me create a cleaner workspace without spending a fortune.
Quick Comparison Table
| Product | Best For | Price Range | Rating |
|---|---|---|---|
| Cable Management Tray | Hiding power strips | $$ | ★★★★★ |
| Velcro Cable Ties | Organizing multiple cables | $ | ★★★★★ |
| Cable Clips | Routing charging cables | $ | ★★★★☆ |
| Cable Sleeve | Bundling wires together | $ | ★★★★☆ |
| Under-Desk Wire Basket | Large setups | $$ | ★★★★★ |
| Magnetic Cable Holder | Frequently used cables | $ | ★★★★☆ |
| Adhesive Cable Raceway | Wall-mounted desks | $$ | ★★★★☆ |
Why Cable Management Matters More Than Most People Think
Many people assume cable management is purely cosmetic. I used to think the same thing.
After organizing my cables, I noticed several unexpected benefits:
- Dust was easier to clean.
- Finding the right cable became simple.
- My desk felt larger.
- The workspace looked more professional during video calls.
- I stopped accidentally unplugging devices.
Even a budget setup can look premium when cables are hidden properly.
1. Install an Under-Desk Cable Management Tray
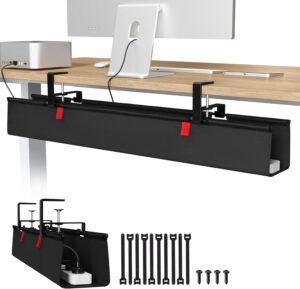
Why It Works
This was probably the biggest improvement I made.
Instead of letting cables hang behind the desk, I mounted a cable tray underneath. The power strip, monitor cables, and charger adapters all disappeared from view instantly.
Pros
- Hides most cables completely
- Creates a clean floating look
- Works with almost any desk
Cons
- Requires installation
- Some trays are too small for large power bricks
Best Use Case
Perfect for desks with monitors, laptops, speakers, and multiple power adapters.
2. Use Velcro Cable Ties Instead of Zip Ties
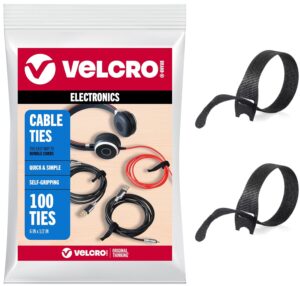
I made the mistake of using plastic zip ties when I first organized my setup.
Everything looked great until I wanted to move a monitor.
Cutting dozens of zip ties became frustrating.
Velcro ties solved that problem immediately.
Pros
- Reusable
- Easy to adjust
- Affordable
- No cutting required
Cons
- Slightly bulkier than zip ties
Best Use Case
Bundling monitor cables, keyboard wires, and charging cables.
3. Route Frequently Used Cables with Cable Clips
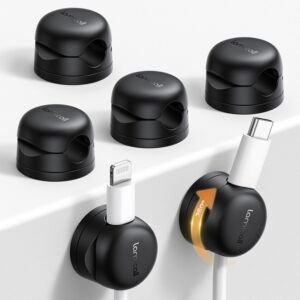
One issue I constantly faced was losing charging cables behind my desk.
A simple cable clip fixed it.
These small adhesive clips attach to the edge of your desk and keep cables exactly where you need them.
Pros
- Very inexpensive
- Prevents cables from falling
- Easy installation
Cons
- Adhesive quality varies
Best Use Case
Phone chargers, smartwatch chargers, USB-C cables, and headphone cables.
4. Bundle Wires with Cable Sleeves
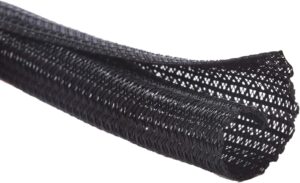
If your desk has several cables running to the same location, cable sleeves can make a huge difference.
Instead of seeing six separate wires, you see one clean bundle.
I use a sleeve for monitor, speaker, webcam, and power cables running down one desk leg.
Pros
- Creates a cleaner appearance
- Protects cables
- Easy to install
Cons
- Accessing individual cables takes longer
Best Use Case
Multi-monitor setups and gaming desks.
5. Mount the Power Strip Under the Desk
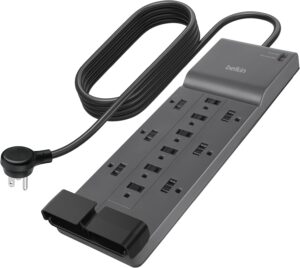
One of the simplest upgrades is moving the power strip off the floor.
Before doing this, I constantly kicked power adapters accidentally.
Mounting the strip underneath the desk solved several problems:
- Less clutter
- Easier cleaning
- Better cable routing
- Safer workspace
Pros
- Cleaner appearance
- Reduces visible cables
- Protects power strips
Cons
- Requires mounting hardware or adhesive
Best Use Case
Minimal office desks and home workstations.
6. Use a Magnetic Cable Holder
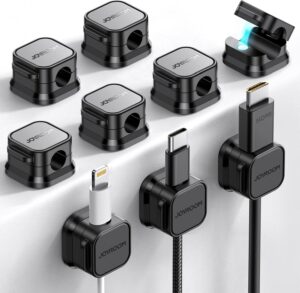
This is one of those small accessories that seems unnecessary until you try it.
A magnetic cable holder keeps frequently used cables accessible without creating clutter.
I keep one near my laptop stand for charging cables and external drives.
Pros
- Convenient access
- Keeps desk organized
- Great for daily use
Cons
- Not ideal for thick cables
Best Use Case
USB-C, Lightning, and charging cables.
7. Hide Cables Along Desk Legs
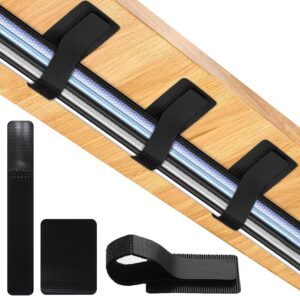
One trick many people overlook is routing cables along desk legs.
Instead of letting wires hang freely, attach them using adhesive clips or Velcro straps.
This small detail creates a surprisingly clean look.
Pros
- Nearly invisible wiring
- Very affordable
- Easy to implement
Cons
- Takes some planning
Best Use Case
Standing desks and open-frame desks.
Step-by-Step Cable Management Process
Whenever I set up a new desk, I follow this process:
Step 1: Unplug Everything
Start with a blank slate.
Step 2: Group Devices
Separate cables into categories:
- Power cables
- Monitor cables
- Charging cables
- Audio cables
Step 3: Mount the Power Strip
Place it underneath the desk whenever possible.
Step 4: Bundle Similar Cables
Use Velcro ties or sleeves.
Step 5: Route Along Desk Edges
Keep cables close to desk legs and frames.
Step 6: Secure Frequently Used Cables
Add clips or magnetic holders.
Step 7: Test Everything
Make sure nothing is stretched or pinched.
Real-World Minimal Desk Example
Here’s a setup that works extremely well for most people:
Equipment
- Laptop
- One monitor
- Wireless mouse
- Wireless keyboard
- Desk lamp
Cable Management Setup
- Under-desk tray
- Mounted power strip
- Velcro cable ties
- Two cable clips
- One cable sleeve
This setup reduces visible cables to almost zero while remaining easy to maintain.
Common Cable Management Mistakes to Avoid
Using Too Many Zip Ties
Future upgrades become frustrating.
Over-Tightening Cables
This can damage wires over time.
Ignoring Cable Labels
If you have multiple devices, labeling saves time later.
Leaving Excess Cable Length Visible
Bundle extra cable length behind the desk.
Buying Cheap Adhesive Accessories
Low-quality adhesive often fails after a few weeks.
Frequently Asked Questions
What is the easiest cable management solution?
Cable clips and Velcro ties are the easiest and cheapest improvements for most desks.
How do I hide a power strip?
Mount it underneath the desk using screws, brackets, or strong adhesive mounts.
Are wireless devices necessary for a minimal setup?
Not necessarily. Good cable management often matters more than going completely wireless.
Do cable sleeves damage cables?
No. Quality cable sleeves simply bundle cables together and can actually provide additional protection.
How often should I reorganize desk cables?
Most setups only need a quick check every few months unless you frequently add new devices.
Final Recommendation
If you’re starting from scratch, don’t buy every cable management accessory at once.
Begin with three essentials:
- An under-desk cable tray
- Velcro cable ties
- A few cable clips
These inexpensive upgrades provide the biggest visual improvement and solve most cable clutter problems immediately.
After organizing several desks over the years, I’ve learned that the cleanest setups aren’t necessarily the most expensive ones. They’re simply the setups where every cable has a designated place.
A minimalist desk doesn’t require fewer devices—it just requires smarter cable management.